Introduction
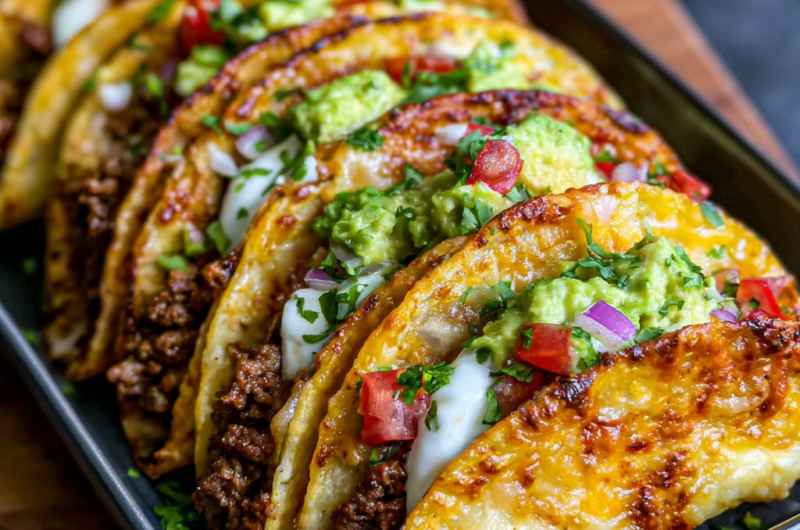
Oven-baked cheesy tacos are a delightful twist on a classic favorite, marrying the crunch of taco shells with gooey, melted cheese and savory fillings. Perfect for busy weeknights or casual gatherings, this recipe simplifies taco-making without sacrificing flavor.
By leveraging the oven's heat, you can achieve a crispy texture while simultaneously melting cheese over your preferred fillings. Gather your family around for a fun meal that’s easily customizable, and watch everyone enjoy their flavorful creations.
Whether you're entertaining guests or feeding a crowd, these cheesy tacos promise to satisfy everyone at the table. Let’s dive into this delicious recipe that brings comfort food to a whole new level.
Ingredients
- 12 taco shells
Taco shells provide the crunchy base that holds all the ingredients together. Using store-bought shells saves time, but you can also make your own if desired. - 1 lb ground beef or turkey
The meat serves as the main protein source in your tacos, adding heartiness and flavor. Using lean meat helps balance the richness of the cheese. - 1 packet taco seasoning
Taco seasoning adds a burst of flavor that defines the dish, blending spices like cumin, chili powder, and garlic. Opt for a low-sodium version to control salt levels. - 1 cup black beans (canned, drained, and rinsed)
Black beans contribute fiber and protein, enhancing the nutritional value. They also add a creamy texture that pairs wonderfully with the meat. - 1 cup corn (canned or frozen)
Corn adds a sweet crunch and a pop of color to your tacos. It complements the savory flavors while providing a contrast in texture. - 2 cups shredded cheese (cheddar or Mexican blend)
Cheese is essential for that gooey, melty topping that brings the tacos together. A blend can provide complexity, while cheddar delivers bold flavor. - 1/2 cup diced tomatoes
Fresh tomatoes introduce a juicy element and acidity to balance the richness of the cheese. They also add freshness and enhance the dish visually. - 1/4 cup chopped onion
Onions contribute a subtle sweetness and a base flavor that adds depth to the taco filling. Sautéing them slightly before assembly can enhance their sweetness. - 1/4 cup chopped fresh cilantro
Cilantro brings a fresh, herbaceous note that can brighten the rich flavors. A sprinkle on top before serving adds visual appeal as well. - Sour cream or guacamole (for serving)
These creamy accompaniments provide a cooling contrast to the warm, spicy tacos. They also enhance flavor complexity, making each bite even more enjoyable.
Directions & Preparation
Step 1: Preheat the oven to 350°F (175°C).
Setting the oven to the right temperature ensures that your tacos will cook evenly and thoroughly. Preheating is crucial because it allows for the immediate cooking necessary for crispy taco shells and melted cheese.
Step 2: In a skillet, brown the ground beef or turkey over medium heat.
Browning the meat not only enhances its flavor through the Maillard reaction but also ensures thorough cooking. Stir occasionally until no longer pink, aiming for a nice sear for added flavor.
Step 3: Drain excess fat, then mix in the taco seasoning and a splash of water.
Adding taco seasoning after draining ensures a concentrated flavor without excess grease. The water helps to evenly distribute the spices and create a cohesive filling.
Step 4: Stir in black beans, corn, diced tomatoes, and chopped onion, mixing well.
Incorporating these ingredients not only adds flavor but also textures and colors. The beans and corn provide a creamy and sweet contrast to the savory meat, making each bite more interesting.
Step 5: Arrange taco shells in a baking dish and fill each with the meat mixture.
Lining the taco shells in a dish ensures they remain upright and are less likely to spill when filled. This assembly step sets the stage for an even melt as the cheese browns in the oven.
Step 6: Top each filled taco with a generous amount of shredded cheese.
Melting the cheese atop the filling creates that comfort food, gooey effect. Using a generous amount ensures that each bite has that delightful cheesiness everyone loves.
Step 7: Bake in the preheated oven for 15-20 minutes until cheese is bubbly and golden.
Baking allows the taco shells to crisp up and the cheese to melt into a beautiful layer. Keep an eye on them to avoid burning; a golden color indicates they’re perfectly cooked.
Step 8: Remove from the oven and let cool for a few minutes before serving.
Letting the tacos cool slightly allows the filling to set, making them easier to eat without spilling. This also gives time for the flavors to meld slightly as they cool.
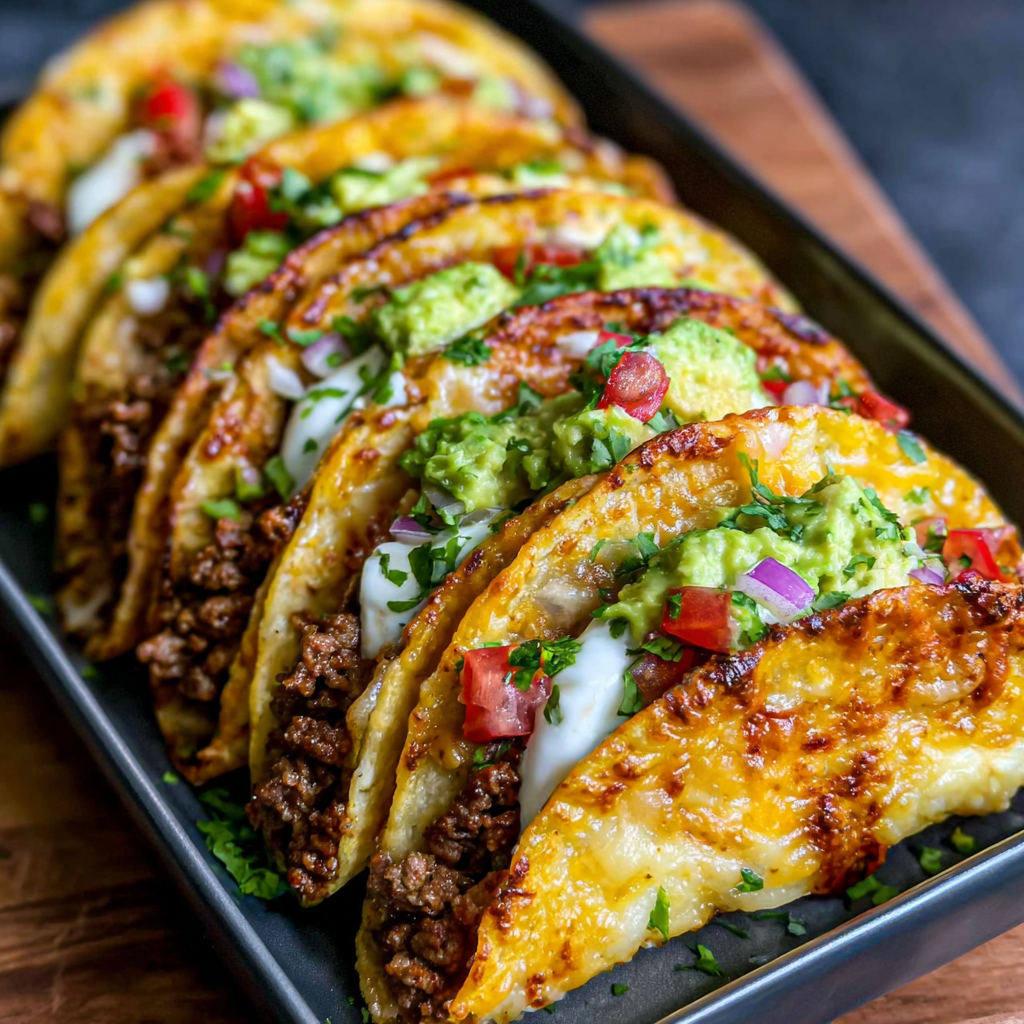
Step 9: Garnish with diced tomatoes, cilantro, and serve with sour cream or guacamole.
Adding fresh toppings allows for customization and extra flavor. The cool toppings contrast nicely with the warm tacos, making the dish balanced and visually appealing.

Perfectly Crispy Taco Shells
Choosing the right taco shells is crucial for achieving that desired crunch. Opt for sturdy varieties that can withstand baking without crumbling. For an authentic taste, you can lightly fry corn tortillas before baking them, or consider using mini flour tortillas for a soft alternative. Either way, ensuring they are dry before filling is essential for preventing sogginess post-baking.
Flavor Variations to Explore
Get creative with your filling by incorporating different proteins or vegetables. Consider using shredded chicken, sautéed bell peppers, or even roasted vegetables for a meatless version. Spice enthusiasts might enjoy adding jalapeños or a dash of hot sauce in the meat mixture for a heat boost. Each variation provides a personal touch, allowing you to adapt the recipe based on your pantry staples or guests' preferences.
The Ultimate Cheese Meltdown
Selecting the right cheese can elevate your oven-baked tacos to new heights. Combining different cheeses, like Monterey Jack with pepper jack, adds depth and complexity. For a unique twist, consider adding queso fresco for its crumbly texture or even a drizzle of nacho cheese sauce for extra indulgence. The melting characteristics of your cheese choice will determine the creamy outcome.
FAQs
What can I do if the filling is too thick?
If the filling feels too thick, you can add a splash of water or broth while mixing to loosen it up. This adjustment will help distribute the flavors better and ensure a more enjoyable texture.
How can I spice up my filling if it's bland?
For bland filling, consider adding a squeeze of lime juice, extra seasoning, or even a splash of hot sauce. These additions will enhance the flavor profile and make the dish more exciting.
Can I use a different meat for this recipe?
Absolutely! Feel free to use ground chicken, meat substitutes, or even fish based on your taste preferences. Adjust cooking times accordingly to ensure everything is fully cooked.
What do I do if the cheese doesn't melt properly?
If the cheese isn’t melting well, it may be due to the type used or the oven temperature. Ensure your cheese is at room temperature before baking, and check that the oven is properly preheated for optimal melting.
Can I include vegetables in my taco filling?
Yes, adding vegetables like bell peppers, zucchini, or spinach not only enhances nutrition but also adds flavor and texture. Sauté them with the meat for the best results.
Why did my taco shells burn on the edges?
Burned edges can occur if the shells are very thin or if the oven temperature is too high. Check your oven calibration, and consider covering the taco dish with foil for part of the cooking time to prevent over-browning.
How can I make this recipe spicier?
To add heat, incorporate diced jalapeños into the meat mixture or use spicy taco seasoning. A sprinkle of chili powder or crushed red pepper flakes can also kick up the spice level significantly.
What if I don’t have taco seasoning on hand?
You can create a quick homemade taco seasoning blend using chili powder, cumin, paprika, garlic powder, and salt. Simply mix these spices together in equal parts for a flavorful alternative.
Conclusion
Oven-baked cheesy tacos are more than just a meal; they offer a fun, shared cooking experience for family and friends. With endless possibilities for customization, each batch can be uniquely yours.
With this approachable recipe, you'll find it easy to bring the warmth and comfort of home-cooked tacos to your table. Gather your loved ones and enjoy this delightful and satisfying dish any night of the week.
Recipe Card
Oven-Baked Cheesy Tacos for a Family Feast
Ingredients
Method
- Preheat the oven to 350°F (175°C).
- In a skillet, brown the ground beef or turkey over medium heat.
- Drain excess fat, then mix in the taco seasoning and a splash of water.
- Stir in black beans, corn, diced tomatoes, and chopped onion, mixing well.
- Arrange taco shells in a baking dish and fill each with the meat mixture.
- Top each filled taco with a generous amount of shredded cheese.
- Bake in the preheated oven for 15-20 minutes until cheese is bubbly and golden.
- Remove from the oven and let cool for a few minutes before serving.
- Garnish with diced tomatoes, cilantro, and serve with sour cream or guacamole.
Notes
Additional serving suggestions: pair with a crisp salad, garlic bread, or roasted seasonal vegetables for balance.
For make-ahead, prep components separately and assemble just before heating to preserve texture.
Taste and adjust with acid (lemon/vinegar) and salt right at the end to wake up flavors.


