Introduction
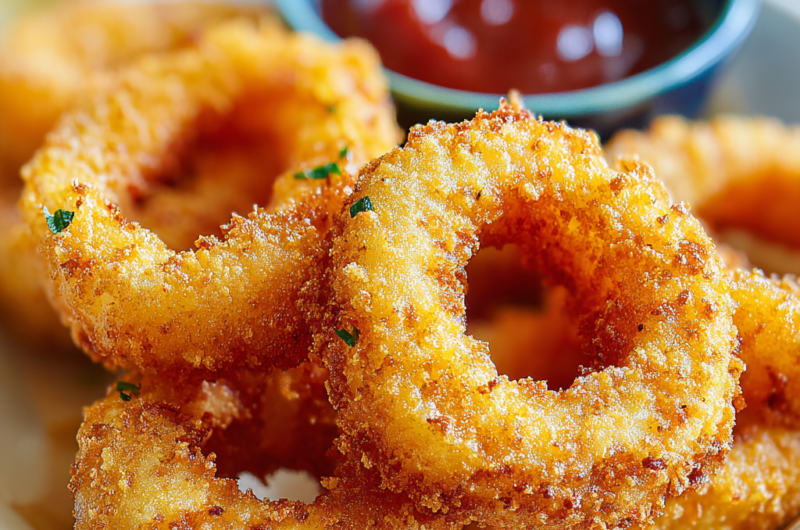
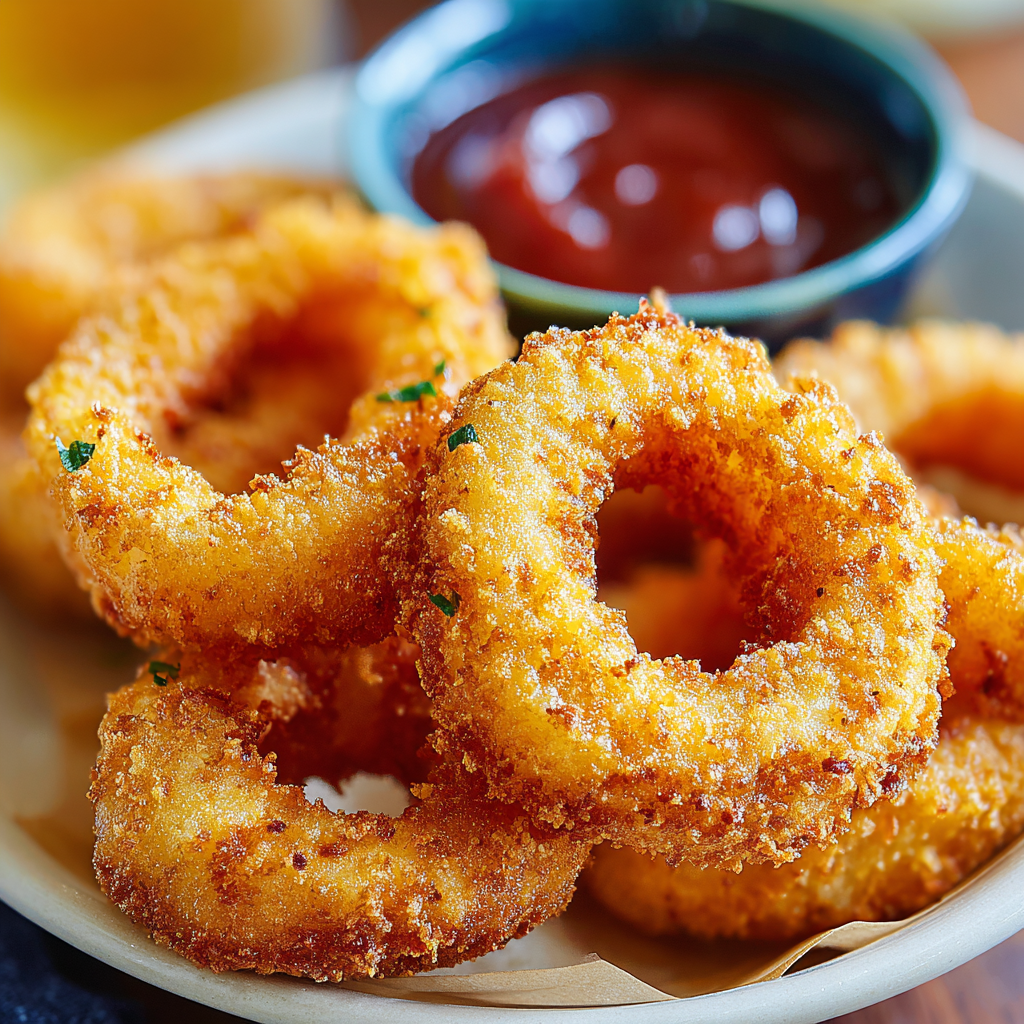
Crispy onion rings are a beloved snack and side dish, adored for their crunchy exterior and tender onion inside. The process of making perfect onion rings at home is both rewarding and surprisingly simple. With the right techniques and ingredients, you can achieve that restaurant-quality crispiness.
These delightful bites can elevate any meal, whether served alongside burgers or as a stand-alone treat. The satisfaction of biting into a perfectly fried onion ring, which rattles with a satisfying crunch, is irresistible. Follow along to learn how to master this classic dish in your own kitchen.
Ingredients
- 2 large onions
The main ingredient, onions, provide both flavor and texture when fried. Sweet onions like Vidalia or yellow onions work best, as they caramelize beautifully, enhancing the overall taste of the onion rings. - 1 cup all-purpose flour
Flour is the base for the coating, providing the essential structure and helping create a crispy texture. It also allows other ingredients, like seasonings, to adhere to the onion slices effectively. - 1 teaspoon baking powder
Baking powder lightens the batter, leading to a fluffier coating when fried. It creates a slight rise, contributing to the desired crunch without making the exterior too dense. - 1 teaspoon salt
Salt enhances all the flavors in the onion rings, making them more savory. It's important for balancing the sweetness of the onions and the richness from frying. - 1 teaspoon paprika
Paprika adds a subtle smokiness and depth to the batter, enhancing both flavor and color. It makes the onion rings more visually appealing and provides a slight kick without being overwhelming. - 1 cup buttermilk
Buttermilk not only tenderizes the onions but also adds richness to the batter. The acidity helps to mellow the strong onion flavor while creating an engaging taste experience. - Oil for frying
A high smoke point oil, like vegetable or peanut oil, is essential for frying. It ensures the onion rings cook evenly and quickly, resulting in a crispy finish without absorbing excess oil.
Directions & Preparation
Step 1: Prepare the onions.
Begin by peeling and slicing the onions into thick rings, approximately 1/4 to 1/2 inch wide. Thicker rings will maintain their structure during frying and provide a satisfying bite. Aim to keep the rings as uniform as possible for even cooking.
Step 2: Soak the onion rings.
Place the sliced onion rings in a bowl of buttermilk and let them soak for at least 30 minutes. This soaking process not only tenderizes the onions but also allows for a better batter adherence, ensuring a deliciously crispy exterior.
Step 3: Prepare the batter.
In a separate bowl, whisk together the flour, baking powder, salt, and paprika. This dry mixture is crucial as it creates the famous crunchy coating. Make sure to blend the ingredients thoroughly to evenly distribute the seasonings for consistent flavor.
Step 4: Heat the oil.
Heat at least two inches of oil in a deep pot or fryer over medium-high heat to about 350°F (175°C). The right temperature is crucial for crispy onion rings; if the oil is too cool, the rings will absorb oil and become greasy instead of crispy.
Step 5: Coat the onion rings.
Once the onions have soaked, remove them from the buttermilk and shake off any excess. Dredge each ring in the flour mixture, ensuring they're thoroughly coated. This initial dusting will create a barrier that seals the buttermilk flavors in and leads to a crunchy outside.
Step 6: Fry the onion rings.
Gently lower the coated onion rings into the hot oil in batches, being careful not to overcrowd the pan. Fry them for about 3-4 minutes per side or until they are golden brown. This method allows for even cooking and a perfect texture.
Step 7: Drain and season.
Once cooked, transfer the onion rings to a wire rack or paper towel-lined plate to drain excess oil. While they're still hot, sprinkle a little more salt over the top to enhance the flavor and keep the rings crispy.
Step 8: Serve immediately.
Crispy onion rings are best enjoyed fresh to retain their texture. Serve them warm, paired with your favorite dipping sauces, like ranch, ketchup, or spicy mayo. The crispy exterior with the soft onion inside is a combination that never fails to impress.

The Art of Soaking Onion Rings
Soaking the onion rings in buttermilk is a crucial step that not only tenderizes the onions but also infuses them with flavor. The acidity in buttermilk breaks down the harshness of raw onions, ensuring a more balanced sweetness once fried. Moreover, this soaking period allows the batter to adhere better, leading to an irresistibly crunchy texture that encapsulates the onions beautifully.
Frying Techniques for Optimal Crispiness
The right frying technique can make or break your onion rings. Maintaining an oil temperature of around 350°F ensures that the rings fry quickly, sealing in moisture while creating that coveted crispy outer layer. It's also essential to avoid overcrowding the pan, as this lowers the oil's temperature, resulting in soggy onion rings instead of the desired golden crisp.
Seasoning Beyond Just Salt
While salt is essential for flavor, experimenting with additional spices in the flour mixture can elevate your onion rings. Ingredients like garlic powder, onion powder, or even cayenne pepper can add an extra layer of flavor that makes your onion rings stand out. This seasoning innovation can personalize the dish and leave a lasting impression on all who taste them.
FAQs
Why are my onion rings soggy?
Soggy onion rings often occur due to insufficient oil temperature. Ensure the oil is hot enough before frying, as this helps achieve a crispy texture.
How thick should I cut my onion rings?
Aim for slices that are about 1/4 to 1/2 inch thick. This thickness allows the rings to maintain their shape while cooking and affects the overall texture.
Can I use a different type of flour?
Yes, you can experiment with different flours like whole wheat or gluten-free alternatives. However, be aware that it may slightly affect texture and flavor.
What can I do if the batter is too thick?
If the batter feels too thick, simply add a splash of buttermilk or water to loosen it up. This ensures an even coating on the onion rings for frying.
Should I let the onion rings cool before serving?
For the best texture, serve the onion rings immediately after frying. If they cool down, they may lose their crispiness, so enjoy them fresh!
Can I bake onion rings instead of frying?
Yes, you can bake onion rings at 400°F, but they won't be as crispy as fried versions. Consider spraying them lightly with oil before baking for added crunch.
What dipping sauces pair well with onion rings?
Popular dipping sauces include ranch dressing, spicy mayo, and classic ketchup. Feel free to experiment with your favorites for unique flavor combinations.
Conclusion
Crispy onion rings are a delightful addition to any meal or a tasty snack on their own. By following these steps, you can recreate this beloved dish right in your kitchen, impressing family and friends alike.
With the right techniques and a passion for cooking, achieving the perfect crunch is within reach. Enjoy serving up your homemade crispy onion rings and savor the rewards of your culinary endeavor.
Recipe Card
Creating Perfectly Crispy Onion Rings at Home
Ingredients
Method
- Prepare the onions.
- Soak the onion rings.
- Prepare the batter.
- Heat the oil.
- Coat the onion rings.
- Fry the onion rings.
- Drain and season.
- Serve immediately.
Notes
Additional serving suggestions: pair with a crisp salad, garlic bread, or roasted seasonal vegetables for balance.
For make-ahead, prep components separately and assemble just before heating to preserve texture.
Taste and adjust with acid (lemon/vinegar) and salt right at the end to wake up flavors.