Introduction
As the holiday season approaches, the spirit of festive joy fills the air. One delightful treat that can bring smiles to faces of all ages is Grinch Fudge from Made in a Pinch. This playful, vibrant confection not only satisfies your sweet tooth but also encapsulates the whimsy of the beloved Dr. Seuss character, the Grinch.
The beauty of this fudge lies in its simplicity and charm. With basic ingredients and a straightforward process, it's perfect for both seasoned bakers and novice home cooks. Not only will it serve as a wonderful dessert, but it can also double as a creative gift for friends and family who appreciate a little holiday cheer.
Ingredients
- 1 cup white chocolate chips
White chocolate chips provide the base of the fudge, melting down to create a smooth, creamy texture. They carry the sweetness of the fudge and act as a canvas for the other flavors. - 1/2 cup sweetened condensed milk
Sweetened condensed milk enhances creaminess and adds a rich sweetness. It helps bind the ingredients together, ensuring a smooth consistency that sets perfectly. - 1/2 teaspoon peppermint extract
Peppermint extract infuses the fudge with a refreshing holiday flavor, reminiscent of candy canes. This subtle minty touch adds a festive twist that complements the sweetness. - Green food coloring
Green food coloring gives the fudge its signature Grinch hue. A few drops are all you need to achieve that vibrant shade, perfect for spirited presentations. - 1/2 cup mini marshmallows
Mini marshmallows introduce a delightful chewy texture to the fudge, enhancing the overall mouthfeel. They also add whimsy, making the fudge visually appealing and fun. - 1/4 cup crushed peppermint candy
Crushed peppermint candy adds a crunchy texture and a burst of flavor, elevating the fudge with a festive touch. It also boasts a beautiful contrast, making the fudge even more enticing.
Directions & Preparation
Step 1: Prepare your baking dish
Line an 8-inch square baking dish with parchment paper, leaving some overhang for easy removal. This step is crucial; without proper lining, the fudge may stick to the dish, making it challenging to achieve neat squares. Think of your parchment paper as a safety net for your fudgy masterpiece.
Step 2: Melt the white chocolate and condensed milk
In a microwave-safe bowl, combine white chocolate chips and sweetened condensed milk. Microwave in 30-second intervals, stirring in between until completely melted and smooth. This step is vital as it ensures a creamy base without scorching the chocolate. Stirring helps prevent any uneven melting, leading to a consistent texture.
Step 3: Add peppermint extract and food coloring
Once the chocolate mixture is smooth, stir in the peppermint extract and add green food coloring. Adjust the coloring until you achieve your desired Grinch green hue. This is your chance to make the fudge visually striking. The peppermint not only enhances flavor but also pairs perfectly with the sweetness of the chocolate.
Step 4: Fold in marshmallows and crushed peppermint
Gently fold in the mini marshmallows and crushed peppermint candy. The marshmallows will create pockets of chewy goodness while the peppermint pieces add a delightful crunch. Be careful not to overmix; we want to keep those textures intact for when you bite into the fudge!
Step 5: Pour into the prepared dish
Transfer the fudge mixture to the prepared baking dish, spreading it evenly into the corners. This ensures that each square will be the same thickness, leading to uniform pieces once set. Tapping the dish gently on the counter can help eliminate any air bubbles.
Step 6: Chill until set
Place the baking dish in the refrigerator for at least 2 hours, or until the fudge is firm. Chilling allows the fudge to set up properly, reaching that perfect sliceable consistency. Patience is key here; proper cooling ensures the flavors meld beautifully.
Step 7: Slice and serve
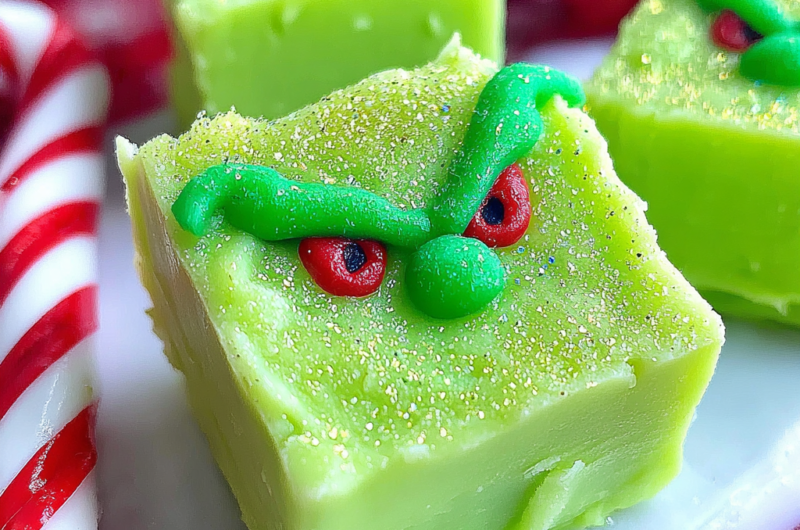
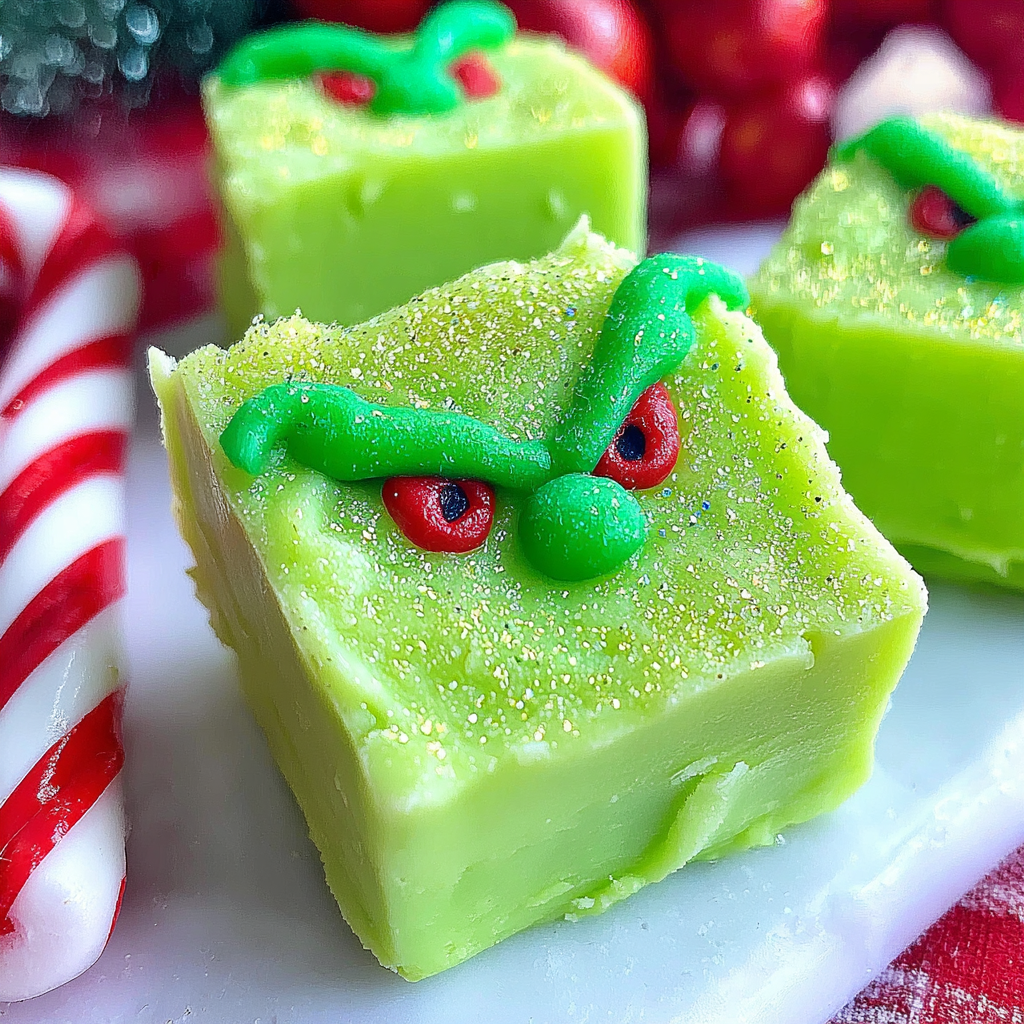
Once the fudge is set, lift it out of the dish using the parchment overhang and cut it into squares. The vibrant green color and festive toppings make for a striking presentation. Serve it on its own, or place it in a decorative box for an adorable holiday gift.

The Charm of Colorful Decor
The vibrant green hue of Grinch Fudge brings a playful element to your dessert table. Its eye-catching appearance makes it a beloved choice for holiday parties or gatherings. When you add crushed peppermint on top, it not only boosts the visual appeal but also invites a delightful crunch, enhancing the overall texture of the treat.
A Twist on Traditional Fudge
Grinch Fudge from Made in a Pinch is a delightful departure from classic fudge recipes. Traditional fudges often lean heavily on rich chocolate flavors, but this recipe stands out with its refreshing peppermint twist. It's a wonderful way to incorporate seasonal flavors while maintaining the beloved gooey fudge consistency everyone loves, making it accessible and exciting.
Gifting with a Personal Touch
Homemade Grinch Fudge makes for an impressive gift that shows thoughtfulness and creativity. Present it in a festive box or a mason jar for a charming touch. This not only spreads holiday cheer but also creates lasting memories, as your friends and family savor each decadent bite. Plus, the fun, festive visual makes it an eye-catching addition to any holiday gift.
FAQs
What if my fudge is too thick after cooling?
If your fudge feels too thick and hard, it may have cooled too long or at too low a temperature. Try warming it slightly, and if you want to salvage it, you can re-melt it with a bit of condensed milk to loosen the texture.
Can I make a layer of chocolate below the green fudge?
Yes, you can create a layered effect by pouring a layer of melted chocolate before adding the green fudge. Just allow the bottom layer to set briefly before topping with the green mixture.
How can I make this fudge less sweet?
To reduce sweetness, consider omitting some of the sweetened condensed milk or reducing the amount of white chocolate chips. You could also balance the sweetness with a pinch of salt.
What if I don't have peppermint extract?
If you don't have peppermint extract on hand, you can substitute it with vanilla extract for a different flavor profile. It won’t give the same minty taste, but it will still create a delicious fudge.
How can I give my fudge a more intense peppermint flavor?
In addition to using peppermint extract, you can fold in more crushed peppermint candy to boost the flavor profile and deliver that festive taste.
What toppings can I use besides peppermint candy?
You could replace the crushed peppermint with toppings like chopped nuts, sprinkles, or mini chocolate chips for a different taste and texture combination.
Conclusion
Creating Grinch Fudge from Made in a Pinch is an enjoyable activity that brings the spirit of the holidays alive in your kitchen. With its playful flavor and appealing presentation, it is sure to be a hit at any gathering, evoking smiles akin to those of the Grinch himself once his heart grew three sizes.
So gather your ingredients, unleash your creativity, and prepare to delight your friends and family with this festive treat. Whether served on its own or as part of a larger spread, Grinch Fudge plays a charming role in the holiday season.
Recipe Card
Delightful Grinch Fudge for Holiday Fun
Ingredients
Method
- Prepare your baking dish
- Melt the white chocolate and condensed milk
- Add peppermint extract and food coloring
- Fold in marshmallows and crushed peppermint
- Pour into the prepared dish
- Chill until set
- Slice and serve
Notes
Additional serving suggestions: pair with a crisp salad, garlic bread, or roasted seasonal vegetables for balance.
For make-ahead, prep components separately and assemble just before heating to preserve texture.
Taste and adjust with acid (lemon/vinegar) and salt right at the end to wake up flavors.