Introduction
Cherry pie is a classic dessert that evokes feelings of warmth and nostalgia, often reminding us of summer gatherings and family cookouts. The sweet and tart flavor of cherries, enveloped in a flaky crust, makes it a beloved choice among many. Whether you're a seasoned baker or a novice in the kitchen, making a cherry pie can be a delightful experience.
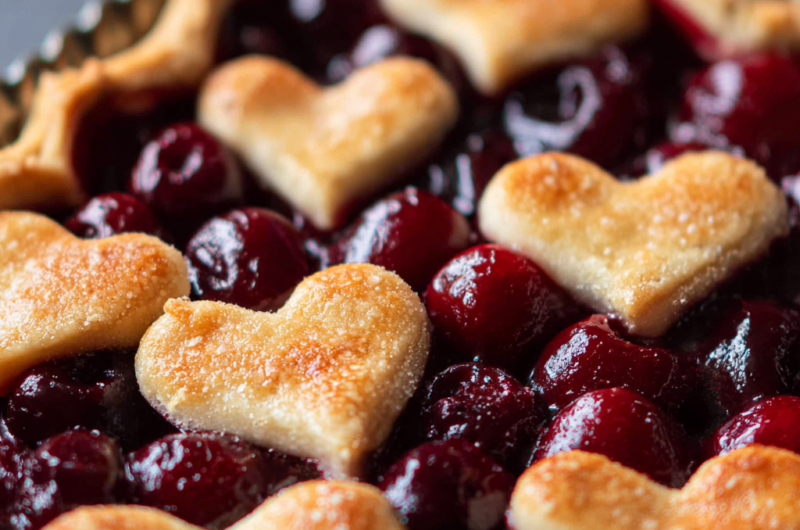
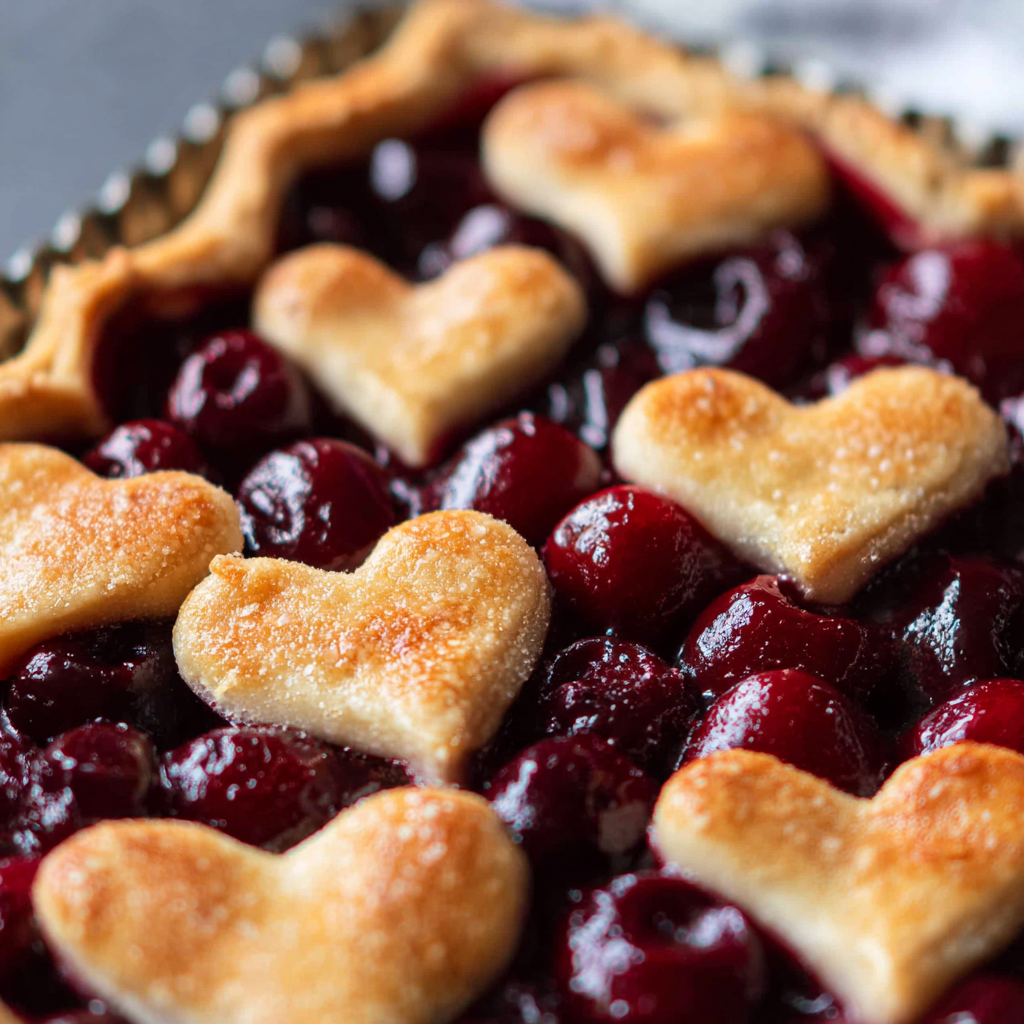
This pie is not just about taste; it’s also about the satisfaction of creating something from scratch. The beautiful red filling peeks through the golden lattice top, creating a visual treat that’s as appealing as it is delicious. As you prepare to delve into this recipe, remember that each step is an opportunity to infuse your own touch into this timeless dish.
Ingredients
- 4 cups fresh or frozen cherries
Cherries are the star of the pie, providing not only flavor but also a vibrant color that enhances the dessert's appeal. When using frozen cherries, they should be thawed and drained to prevent excess moisture. - 1 cup granulated sugar
Sugar is essential for balancing the tartness of cherries and adding sweetness to the filling. It also plays a role in the caramelization process during baking, creating a desirable texture and flavor. - 2 tablespoons cornstarch
Cornstarch acts as a thickening agent, helping to bind the juices released from the cherries so that the filling is cohesive and doesn’t run when sliced. It ensures the pie holds its shape beautifully. - 1 tablespoon lemon juice
Lemon juice adds acidity, which brightens the flavors of the cherries and enhances their natural sweetness. It also helps in balancing the overall taste of the pie. - 1 teaspoon vanilla extract
Vanilla extract enriches the flavor profile of the cherry filling, adding depth and a pleasant aroma that complements the fruit. - 1/2 teaspoon almond extract (optional)
Almond extract provides a subtle nutty flavor that pairs wonderfully with cherries. It’s optional, but it can enhance the complexity of the dessert. - 1 pie crust (homemade or store-bought)
The pie crust serves as the foundation of the dessert, providing a flaky texture that contrasts beautifully with the juicy filling. A homemade crust can elevate the pie, though store-bought varieties offer convenience. - 1 egg (for egg wash)
An egg wash gives the pie crust a golden, glossy finish when baked. This step enhances the aesthetic appeal and creates a slightly crisp texture.
Directions & Preparation
Step 1: Preheat the oven to 425°F (220°C).
Preheating the oven is crucial for achieving a perfectly baked crust that is flaky and golden. An adequate temperature ensures that the pie cooks evenly, giving the filling enough heat to bubble without overcooking the crust.
Step 2: Prepare the cherries by pitting and rinsing them if fresh, or thawing and draining if frozen.
Properly preparing the cherries is vital for the pie’s success. Fresh cherries should be pitted to avoid unpleasant bites, while frozen cherries must be thoroughly drained to prevent excess liquid, which can lead to a soggy crust.
Step 3: In a large mixing bowl, combine the cherries, sugar, cornstarch, lemon juice, vanilla extract, and almond extract if using.
Mixing the filling ingredients allows them to meld together, ensuring that the flavors balance perfectly. The cornstarch will help absorb the juices that will release during baking, creating a thick, luscious filling.
Step 4: Roll out the pie crust and place it in a 9-inch pie dish, leaving some overhang.
Rolling out the dough correctly sets the stage for a great crust. Make sure to use a flour-dusted surface to prevent sticking, and don’t worry if the edges are uneven; they can be trimmed later or crimped for decoration.
Step 5: Pour the cherry mixture into the prepared crust and distribute evenly.
Even distribution of the cherry filling is important for cooking evenly. This step ensures that every slice offers a balanced combination of cherries and crust, delivering the perfect bite each time.
Step 6: Cut additional crust into strips to create a lattice top, if desired, and place over the filling.
Creating a lattice top not only looks visually appealing but also allows steam to escape during baking, preventing overflow. It also adds extra texture and crunch to every slice.
Step 7: Trim the excess crust, fold the edges under, and crimp or decorate as desired.
Trimming the crust prevents burning and ensures a cleaner edge. This step also allows for creative expression; a beautifully crimped edge can elevate the pie’s presentation.
Step 8: Brush the crust with egg wash for a golden finish.
The egg wash is essential for achieving a desired golden color on the crust. This adds an appealing shine and helps in giving a crisp texture, culminating in a beautiful baking outcome.
Step 9: Bake the pie in the preheated oven for 45-50 minutes, until the crust is golden brown and juices are bubbling.
Baking time is critical to ensure the crust is fully cooked and the filling is set. Watch for bubbling juices, which indicate that the thickening agent is functioning properly, and the pie is nearing completion.
Step 10: Allow the pie to cool for at least 2 hours before serving.
Cooling the pie is crucial as it allows the filling to set, preventing a runny mess when slicing. Patience pays off here, as flavors meld and the pie achieves its optimal consistency.

Choosing the Right Cherries
The choice of cherries can dramatically impact your pie's flavor. Tart cherries, often used in traditional recipes, provide a distinct tanginess that contrasts deliciously with sweetness. Sweet cherries can also be used for those who prefer a milder flavor. If using frozen cherries, opt for high-quality varieties to ensure the best results. Whichever you choose, ensure they are pitted and prepared properly.
Perfecting Your Pie Crust
A good pie crust is the backbone of any cherry pie. Consider using a combination of all-purpose flour, butter, and a touch of sugar for flavor. Chilling the dough before rolling helps prevent it from becoming tough. Don’t be afraid to experiment; a touch of almond meal or even a different fat can create unique flavors that complement the cherry filling.
Serving Suggestions for Cherry Pie
Cherry pie can be enjoyed on its own, but it pairs exquisitely with accompaniments like vanilla ice cream or freshly whipped cream. The creaminess of these toppings contrasts the tartness of the cherries and enhances the overall experience. Additionally, serving it warm allows the filling to be even more aromatic, creating a delightful sensory experience.
FAQs
What can I do if the filling is too runny?
If your cherry filling turns out runny, you can further thicken it by returning the pie to the oven for a while to reduce excess juices. Adding a little more cornstarch mixed with water can also help.
Can I use dried cherries instead of fresh or frozen?
Dried cherries can be used, but they require rehydration. Soak them in warm water or juice for a couple of hours before using them in the pie to ensure they have a tender texture.
How can I tell if my pie crust is properly baked?
Look for a golden-brown color and lightly bubbling juices from the filling. When the crust is firm to the touch and slightly crispy, it's generally well-baked.
What if my pie crust is too crumbly?
If your pie crust is crumbly, it may need a little more moisture. Gradually incorporate a teaspoon of cold water until the dough comes together without being sticky.
Can I make the filling spice-infused?
Absolutely! Adding spices like cinnamon or nutmeg can enhance the flavor profile. Start with a pinch and adjust to your taste for a unique twist.
How do I prevent a soggy bottom crust?
To prevent a soggy bottom crust, consider blind baking the crust for 10 minutes before adding the filling. This helps set the crust and creates a barrier against excess moisture.
Conclusion
With its vibrant filling and flaky crust, cherry pie is not just a dessert; it's a vessel for creating memories and sharing moments. The process of baking can be as enjoyable as the final pie itself, allowing for creativity and expression in the kitchen.
As you slice into your finished product, take a moment to appreciate the labor of love that went into it. Enjoying a piece of your homemade cherry pie, possibly with a scoop of ice cream, will undoubtedly bring a sense of fulfillment and joy.
Recipe Card
Delightful Cherry Pie for Every Occasion
Ingredients
Method
- Preheat the oven to 425°F (220°C).
- Prepare the cherries by pitting and rinsing them if fresh, or thawing and draining if frozen.
- In a large mixing bowl, combine the cherries, sugar, cornstarch, lemon juice, vanilla extract, and almond extract if using.
- Roll out the pie crust and place it in a 9-inch pie dish, leaving some overhang.
- Pour the cherry mixture into the prepared crust and distribute evenly.
- Cut additional crust into strips to create a lattice top, if desired, and place over the filling.
- Trim the excess crust, fold the edges under, and crimp or decorate as desired.
- Brush the crust with egg wash for a golden finish.
- Bake the pie in the preheated oven for 45-50 minutes, until the crust is golden brown and juices are bubbling.
- Allow the pie to cool for at least 2 hours before serving.
Notes
Additional serving suggestions: pair with a crisp salad, garlic bread, or roasted seasonal vegetables for balance.
For make-ahead, prep components separately and assemble just before heating to preserve texture.
Taste and adjust with acid (lemon/vinegar) and salt right at the end to wake up flavors.