Introduction
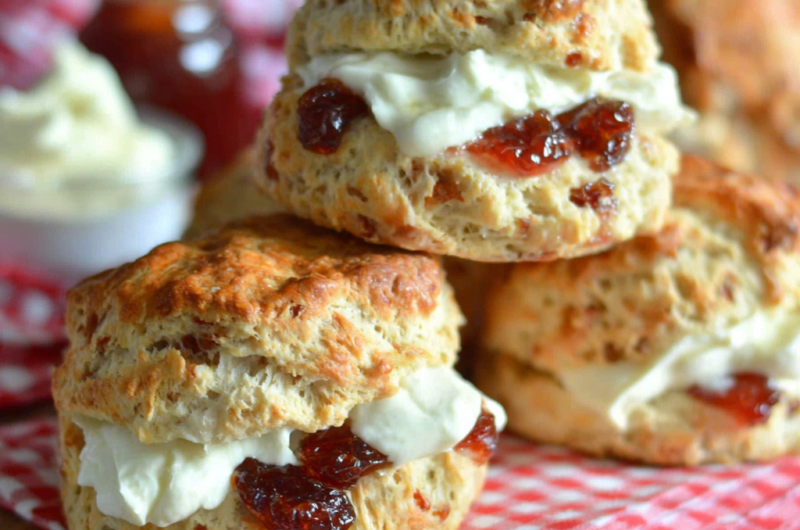
Irish scones, with their tender crumb and rich flavor, are a beloved staple of Irish cuisine. Often enjoyed with clotted cream and jam, they hold a special place at tea time and festive gatherings. Their origin in Ireland dates back to the 19th century, reflecting a simple yet delightful baking tradition that continues to thrive today.
These baked goods are not just versatile but also incredibly simple to make, making them ideal for home cooks looking to explore new recipes. Whether you prefer them plain or with added ingredients like currants or caraway seeds, the joy of making Irish scones lies in their ability to warm both the kitchen and the heart.
Ingredients
- 2 cups all-purpose flour
The base of the scone, all-purpose flour provides structure and texture. It creates the perfect balance between lightness and stability, allowing the scones to rise beautifully. - 1/4 cup granulated sugar
Sugar enhances the flavor and helps the scones develop a golden-brown crust as they bake. It also adds a subtle sweetness, balancing well with toppings like jam. - 1 tablespoon baking powder
A critical leavening agent, baking powder provides the lift needed for scones to rise. It ensures a light and fluffy texture that makes each bite airy and enjoyable. - 1/2 teaspoon salt
Salt is essential for enhancing flavor; it deepens the taste of the scones and balances the sweetness from the sugar. - 1/2 cup unsalted butter, cold
Butter contributes to the scone's rich flavor and tender texture. Using cold butter ensures that the scones remain flaky by creating layers during baking. - 1/2 cup buttermilk
Buttermilk adds moisture and a slight tang, which is characteristic of traditional scones. Its acidity also interacts with baking powder, contributing to the rise. - 1 large egg
Eggs aid in binding the ingredients and also add richness to the flavor. They contribute to the scone’s color and texture, making them wonderfully inviting. - 1/2 cup raisins or currants (optional)
These dried fruits add natural sweetness and chewiness, enhancing the overall flavor profile. They make the scones feel more indulgent without overwhelming them.
Directions & Preparation
Step 1: Preheat the oven to 400°F (200°C).
Preheating ensures that the oven reaches the optimal temperature for baking. This step is critical for achieving the desired rise and browning of the scones.
Step 2: In a large mixing bowl, whisk together flour, sugar, baking powder, and salt.
Whisking the dry ingredients ensures they are thoroughly combined and aerated, preventing clumps and ensuring even distribution of the leavening agent.
Step 3: Cut in the cold butter using a pastry cutter or your fingers until the mixture resembles coarse crumbs.
Cutting in the butter is vital for creating a flaky texture. The pieces of butter should remain visible, as they create pockets of steam while baking, contributing to the scone's lightness.
Step 4: In a separate bowl, combine buttermilk and the egg, whisking until combined.
Combining the wet ingredients allows for a uniform mixture. This mix adds moisture to the dough, which is necessary for binding the dry ingredients together.
Step 5: Pour the wet ingredients into the dry mixture, stirring gently until just combined.
Overmixing can lead to tough scones, so it’s essential to combine the ingredients briefly. The dough should be slightly shaggy, with some flour still visible.
Step 6: If using, fold in the raisins or currants gently into the dough.
Incorporating the dried fruit adds flavor and texture to the scones. Ensure an even distribution to avoid pockets of fruit in only a few scones.
Step 7: Turn the dough out onto a lightly floured surface and pat it into a circle about 1-inch thick.
Patting rather than rolling helps maintain the delicate structure of the dough. A thicker dough encourages a higher rise and softer interior.
Step 8: Cut the circle into wedges or use a round cutter for individual scones.
Cutting shapes helps create distinct scones while also ensuring even baking. Wedges allow for rustic charm, while rounds offer a traditional bakery-style appearance.
Step 9: Transfer the scones onto a lined baking sheet, ensuring they are spaced apart.
Proper spacing promotes even heat circulation, allowing each scone to rise fully and brown properly. A baking sheet lined with parchment paper prevents sticking.
Step 10: Brush the tops with a little buttermilk or egg wash for a glossy finish.
An egg wash or buttermilk glaze adds a beautiful golden color when baked. It also contributes a slight sheen that enhances the visual appeal of the finished scones.
Step 11: Bake for 15-20 minutes, or until golden brown and risen.
Keeping an eye on the scones towards the end of baking ensures they don’t overbake. The goal is a lovely golden hue, which indicates that they are fully cooked and ready to enjoy.
Step 12: Remove from the oven and allow to cool on a wire rack before serving.
Cooling on a wire rack prevents moisture from accumulating underneath, which could make the bottoms soggy. Enjoying them warm allows the flavors to shine through!

Choosing the Right Ingredients for Irish Scones
The key to outstanding Irish scones lies in the selection of quality ingredients. Starting with fresh baking powder ensures optimal leavening power, resulting in a light texture. High-protein flour, like bread flour, can also be employed for a denser scone if desired. The choice of cream or buttermilk affects not only flavor but also moisture content, impacting the final texture of your scones.
Embracing Variations: Sweet and Savory Options
Irish scones are incredibly versatile, allowing for both sweet and savory interpretations. Traditional fruit scones feature raisins or currants, while some baking enthusiasts opt for adventures like cheese and herb scones. Experimenting with flavors, such as adding spices like cinnamon or nutmeg, can elevate the classic scone experience into something uniquely personal and delightfully unexpected.
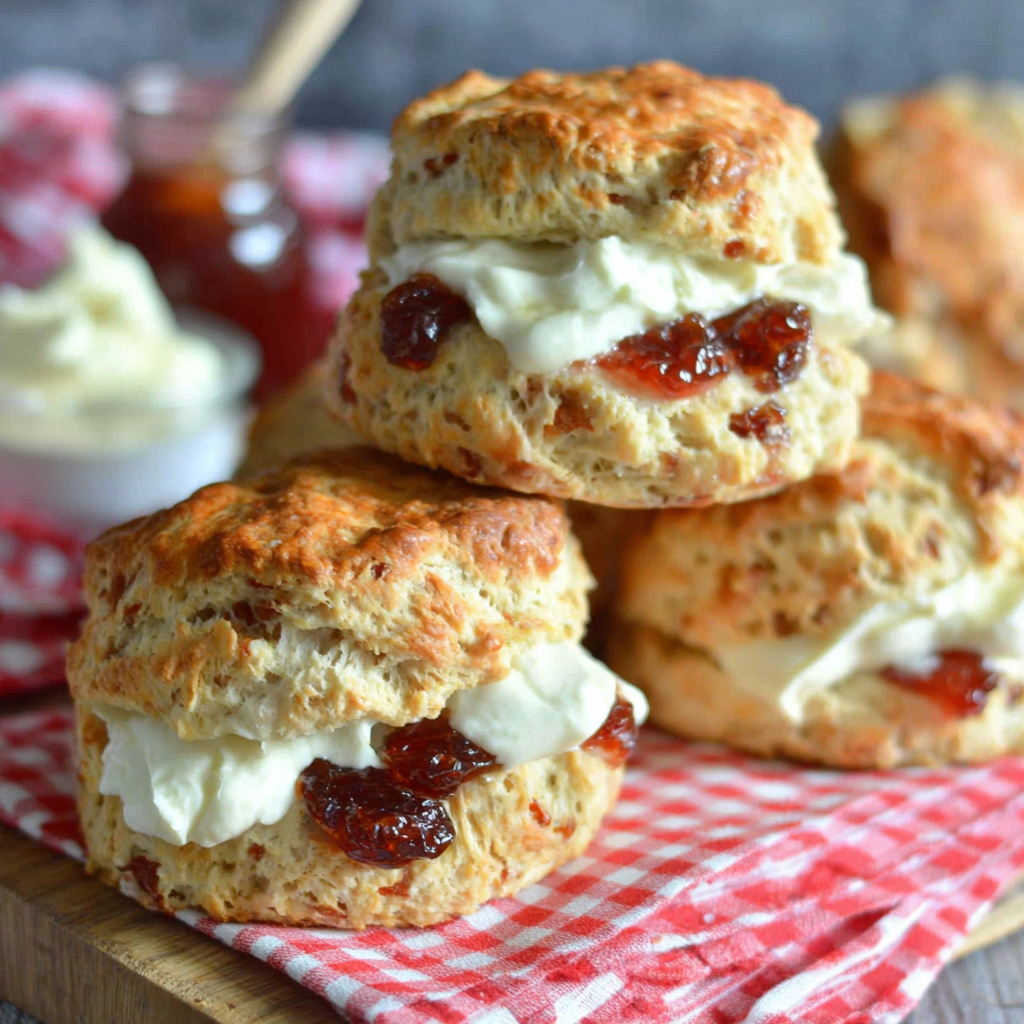
The Perfect Pairings: Enjoying Your Scones
Scones are traditionally served with clotted cream and jam, offering a harmonious blend of richness and sweetness. However, they are also delightful with a simple pat of butter, or even served with a drizzle of honey. Pair your scones with a strong Irish tea or a light, fruity tea for the ideal afternoon snack, making it a true culinary experience to indulge in.
FAQs
What should I do if the dough is too dry?
If your dough feels too dry, consider adding a tablespoon of buttermilk at a time to moisten it without making it sticky. Gentle handling is key.
Why are my scones dense instead of fluffy?
Density can result from overmixing the dough or using too much flour. Ensure you handle the dough minimally to keep the texture light.
Can I use whole wheat flour instead of all-purpose flour?
Yes, whole wheat flour can be used, but it may require additional liquid to reach the right dough consistency due to its higher absorbency.
How can I ensure my scones rise properly?
Ensure your baking powder is fresh, and be mindful not to overmix the dough. Proper oven temperature and spacing on the baking sheet also aid in rising.
What causes scones to create a tough texture?
A tough texture often results from overworking the dough or using too much flour. Be gentle when mixing and shaping.
How can I make my scones sweeter?
To increase sweetness, simply add an additional tablespoon or two of sugar to your dough. Consider also adding a sweeter jam for serving.
What is the best way to enjoy my scones after baking?
Enjoy your warm scones fresh from the oven with clotted cream and your favorite jam for an authentic Irish experience. They are best consumed within a day or two.
Can I add nuts or chocolate chips to my scone mix?
Absolutely! Nuts like pecans or walnuts, or chocolate chips, can add both texture and flavor. Just be sure to adjust the quantity to keep the dough balanced.
Conclusion
Crafting Irish scones at home is a rewarding experience that fills both the kitchen and your heart with warmth. With their simple ingredients and varied possibilities, they invite endless creativity.
Whether enjoyed with a cup of tea or served at a gathering, these little treats become an instant favorite. Embrace the tradition, experiment with flavors, and relish the comforting joy of scones each time you bake.
Recipe Card
The Essence of Perfecting Irish Scones at Home
Ingredients
Method
- Preheat the oven to 400°F (200°C).
- In a large mixing bowl, whisk together flour, sugar, baking powder, and salt.
- Cut in the cold butter using a pastry cutter or your fingers until the mixture resembles coarse crumbs.
- In a separate bowl, combine buttermilk and the egg, whisking until combined.
- Pour the wet ingredients into the dry mixture, stirring gently until just combined.
- If using, fold in the raisins or currants gently into the dough.
- Turn the dough out onto a lightly floured surface and pat it into a circle about 1-inch thick.
- Cut the circle into wedges or use a round cutter for individual scones.
- Transfer the scones onto a lined baking sheet, ensuring they are spaced apart.
- Brush the tops with a little buttermilk or egg wash for a glossy finish.
- Bake for 15-20 minutes, or until golden brown and risen.
- Remove from the oven and allow to cool on a wire rack before serving.
Notes
Additional serving suggestions: pair with a crisp salad, garlic bread, or roasted seasonal vegetables for balance.
For make-ahead, prep components separately and assemble just before heating to preserve texture.
Taste and adjust with acid (lemon/vinegar) and salt right at the end to wake up flavors.