
Introduction
Chocolate marshmallow creations are a beloved treat that melds rich flavors with a fluffy, melt-in-your-mouth texture. Whether enjoyed alone or added to desserts, they have a charm that makes any occasion special.
With their luxe chocolate layer and airy marshmallow center, these treats are perfect for both seasoned bakers and those new to the craft. The process is straightforward, and the result is nothing short of delightful.
In this recipe, you will learn how to create your own chocolate marshmallows from scratch, elevating your dessert game and pleasing your palate.
Ingredients
- 2 cups granulated sugar
Sugar is the backbone of the marshmallow, providing sweetness and structure. It helps create the syrupy base necessary for achieving that fluffy texture. - 3/4 cup cold water
Water is essential for dissolving the sugar and forming the syrup. It affects the final texture, so using the right amount is critical. - 1 cup light corn syrup
Corn syrup adds viscosity and prevents crystallization, ensuring a smooth and soft marshmallow consistent. - 1 tablespoon unflavored gelatin
Gelatin is the key ingredient that gives marshmallows their bouncy, chewy texture. It helps stabilize the mixture as it whips. - 1 teaspoon vanilla extract
Vanilla enhances the flavor profile, delicately complementing the chocolate without overpowering it. - 1/2 cup cocoa powder
Cocoa powder is the main flavoring agent here, giving the marshmallows their distinct chocolate flavor. Quality cocoa will significantly impact the taste. - 1/4 teaspoon salt
Salt balances the sweetness and enhances the overall flavor of the chocolate marshmallows. - 8 ounces semisweet chocolate, chopped
Chopped chocolate is melted to form a rich coating for the marshmallows. Using high-quality chocolate will provide depth and richness. - 1 tablespoon vegetable oil
Oil is added to the melting chocolate to help achieve a smooth, glossy coating that adheres well to the marshmallows.
Directions & Preparation
Step 1: Prepare the pan by greasing it.
Greasing the pan prior to making the marshmallows ensures that they won't stick, allowing for easy removal later. Use cooking spray or a light layer of oil, as this helps maintain the soft surface of the marshmallows.
Step 2: Combine sugar, corn syrup, and water in a saucepan.
In this step, you will dissolve the sugar in the liquid ingredients over medium heat. Stir gently until the mixture reaches a sustained simmer, about 240°F (115°C). This temperature is crucial for setting the marshmallow's structure.
Step 3: Dissolve the gelatin in cold water.
Allow the gelatin to bloom in cold water without stirring. This step is vital as it hydrates the gelatin, which will later provide the marshmallow with its desirable elasticity and stability.
Step 4: Combine melted sugar mixture with gelatin.
Once the sugar syrup reaches the right temperature, carefully pour it over the bloomed gelatin. Allow it to rest for a few minutes, enabling the gelatin to activate and create the right texture.
Step 5: Whip the mixture until fluffy and white.
As you continue to whip the mixture, it will begin to lighten in color and double in volume. This is crucial for achieving the airy texture of your marshmallows.
Step 6: Add cocoa powder, vanilla, and salt to the whipped marshmallow.
Incorporating cocoa powder and other flavoring agents at this stage ensures even distribution, imparting a consistent chocolate flavor throughout the marshmallow.
Step 7: Spread the marshmallow into the prepared pan.
Carefully spread the fluffy marshmallow mixture into your greased pan using a spatula. An even layer will help ensure that the marshmallows set uniformly, yielding the perfect texture.
Step 8: Let the marshmallow set for several hours, ideally overnight.
Allowing the marshmallow to set properly is essential for developing the right texture. Patience is key here—rushing this step can result in a gooey consistency instead of a firm bite.
Step 9: Melt chocolate with vegetable oil for coating.
Melting the chocolate with oil creates a smooth, rich coating for your marshmallows. This step adds a delicious depth to the final product and enhances the overall presentation.
Step 10: Cut the marshmallow into pieces and dip in chocolate.
Using a sharp knife, cut the marshmallow into squares or shapes of your choice. Dipping each piece into the chocolate coating captures the marshmallow's lightness and integrates it with the chocolaty richness.

The Science Behind Marshmallow Texture
Understanding the chemistry of making marshmallows is fascinating. The combination of sugar and gelatin creates a unique structure. As sugar is heated, it goes through a series of stages that allow it to transform into an airy foam when whipped. Gelatin acts as a stabilizer, giving the marshmallow its bouncy texture while preventing it from collapsing. The balance of these ingredients is essential for achieving the perfect fluffy consistency.
Customizing Flavor Profiles for Chocolate Marshmallows
While traditional chocolate marshmallows are delicious, there are myriad ways to personalize this treat. Consider adding peppermint extract for a festive twist or swirling in various flavored oils, such as orange or almond. Adding in spices like cinnamon or chili can elevate the marshmallows further, introducing a complex layer of flavor that surprises and delights the palate.
Serving Suggestions for Chocolate Marshmallows
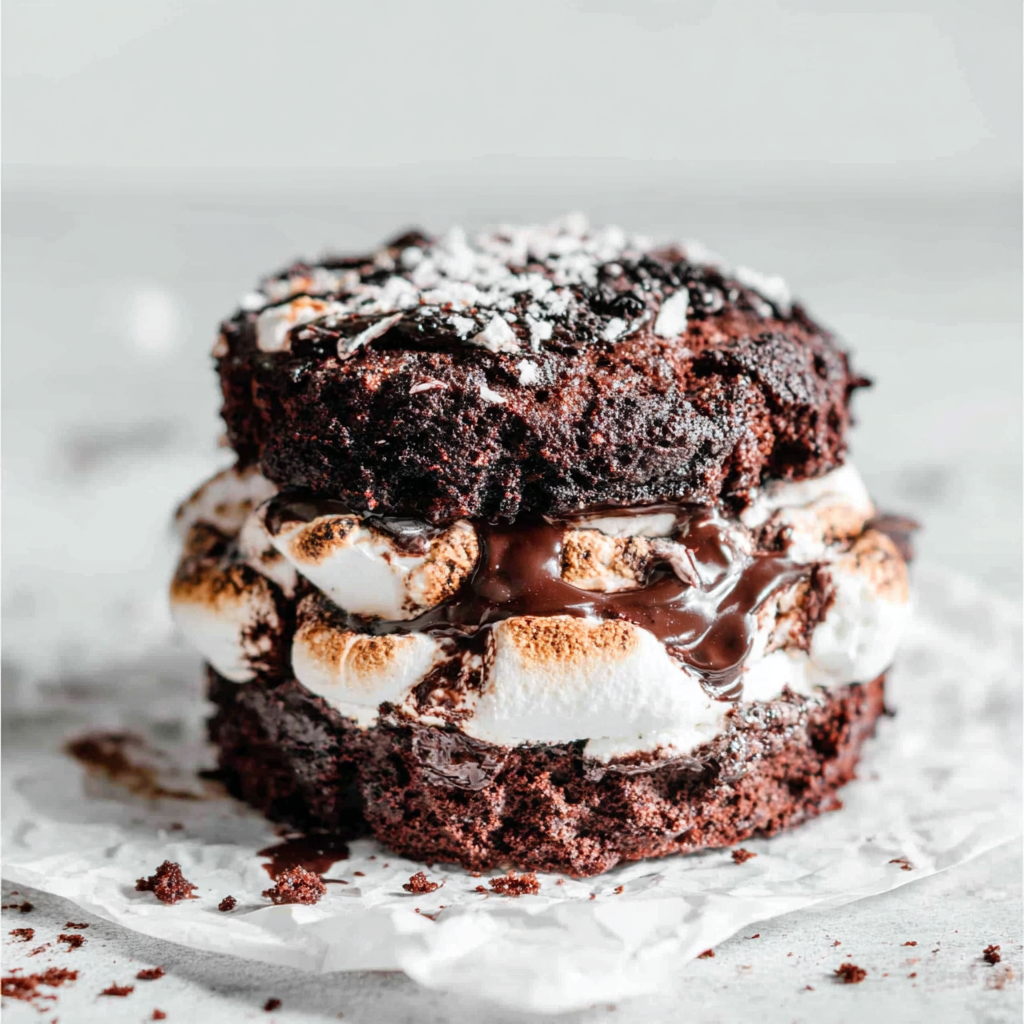
These chocolate marshmallows aren’t just a treat on their own; they can elevate other desserts too. Serve them atop a rich hot chocolate for a delightful experience, use them in s'mores for a luxurious take on the classic, or even layer them into a dessert trifle. The possibilities are endless, and they add a touch of whimsy to any dessert table.
FAQs
What if my marshmallow mixture is too thick?
If the mixture is too thick, it may not have incorporated enough air, or it may have exceeded the whipping time. Ensure you whip until it has doubled in volume and is fluffy but avoid over-whipping.
My chocolate coating is not shiny; what happened?
A dull chocolate coating might result from overheating or improperly tempering the chocolate. Ensure you melt gently and consider tempering for the glossy finish.
Can I use flavored chocolate for dipping?
Absolutely! Flavored chocolate, whether it's white chocolate or other varieties, can enhance your treats further. Just be mindful that it may change the overall flavor of your marshmallow.
How do I know when the sugar syrup reaches the right temperature?
Using a candy thermometer is the most reliable method. You want the syrup to reach 240°F (115°C), the soft ball stage, which ensures proper setting.
What should I do if my marshmallows are too sweet?
If you find your marshmallows overly sweet, you can adjust future batches by decreasing sugar slightly or increasing cocoa powder, providing a more balanced flavor.
Is it possible to reduce the quantity of the recipe?
Yes, you can scale down the recipe by halving the ingredients, but ensure to adjust cooking times and pan size accordingly for even results.
Conclusion
Creating your own chocolate marshmallows from scratch can be a rewarding experience, filled with delightful flavors and textures. These treats are not just about indulgence; they also allow for creativity and personalization.
So gather your ingredients, embrace the process, and enjoy the fruits of your labor. The joy that comes from making these sweets is as delightful as sharing them with family and friends.
Recipe Card
Indulge in Decadent Chocolate Marshmallow Treats
Ingredients
Method
- Prepare the pan by greasing it.
- Combine sugar, corn syrup, and water in a saucepan.
- Dissolve the gelatin in cold water.
- Combine melted sugar mixture with gelatin.
- Whip the mixture until fluffy and white.
- Add cocoa powder, vanilla, and salt to the whipped marshmallow.
- Spread the marshmallow into the prepared pan.
- Let the marshmallow set for several hours, ideally overnight.
- Melt chocolate with vegetable oil for coating.
- Cut the marshmallow into pieces and dip in chocolate.
Notes
Additional serving suggestions: pair with a crisp salad, garlic bread, or roasted seasonal vegetables for balance.
For make-ahead, prep components separately and assemble just before heating to preserve texture.
Taste and adjust with acid (lemon/vinegar) and salt right at the end to wake up flavors.


