Introduction
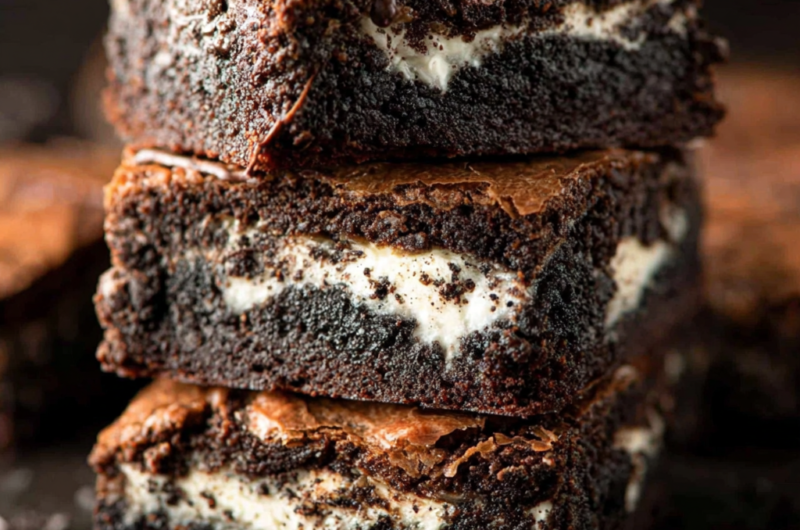
There's something magical about combining the rich, fudgy goodness of brownies with the iconic crunch of Oreos. This delicious treat brings together two beloved desserts into one decadent experience that will leave your taste buds craving more.
Whether you're baking for a special occasion or simply indulging your sweet tooth, Oreo brownies offer a delightful marriage of textures. The creamy filling of Oreos complements the dense, chocolatey brownies, creating a dessert that’s both familiar and unique.
Ingredients
- 1 cup unsalted butter, melted
Butter provides richness and moisture to the brownies, contributing to their fudgy texture. Melting it ensures it incorporates well with the sugar. - 2 cups granulated sugar
Sugar not only sweetens the brownies but also helps achieve the desired chewy texture. Using granulated sugar promotes a nice crust on the brownies. - 4 large eggs
Eggs bind the ingredients together, providing structure. They also add moisture and contribute to the overall texture. - 1 teaspoon vanilla extract
Vanilla enhances the flavor profile of the brownies, making them more aromatic and adding depth to the chocolate taste. - 1 cup all-purpose flour
Flour is the backbone of the brownies, offering structure. The right amount ensures they aren't too cakey or too dense. - 1 cup unsweetened cocoa powder
Cocoa powder gives the brownies their rich chocolate flavor. It's important to use unsweetened to control the overall sweetness of the dessert. - 1 teaspoon baking powder
Baking powder provides leavening, allowing the brownies to rise slightly without becoming too airy. It contributes to a fudgy texture. - 1/2 teaspoon salt
Salt balances the sweetness and enhances all flavors. It’s a crucial component that elevates the chocolate taste. - 10-12 Oreo cookies, coarsely chopped
The Oreos add chunks of crunch and creamy filling, giving the brownies a unique texture and flavor. Their sweet, chocolatey profile complements the brownies perfectly. - 3/4 cup chocolate chips (optional)
Chocolate chips create pockets of molten chocolate throughout the brownies. While optional, they enhance the overall chocolate experience.
Directions & Preparation
Step 1: Preheat the oven to 350°F (175°C) and grease a baking pan.
Preheating the oven is essential for even baking. Greasing the pan, or lining it with parchment paper, prevents the brownies from sticking, making them easier to remove.
Step 2: In a mixing bowl, combine melted butter and sugar until smooth.
Mixing melted butter with sugar helps dissolve the sugar, creating a smooth base. This step also prepares your mixture for a better incorporation of the eggs.
Step 3: Add eggs one at a time, mixing after each addition, then stir in vanilla extract.
Incorporating eggs individually ensures they blend thoroughly without becoming too airy. The vanilla enhances the overall flavor, making every bite richer.
Step 4: In another bowl, whisk together the flour, cocoa powder, baking powder, and salt.
This step ensures that the dry ingredients are evenly distributed, preventing clumps. It’s important not to over-mix once combined with wet ingredients.
Step 5: Gradually add the dry ingredients to the wet mixture, stirring until just combined.
Over-mixing can lead to tougher brownies. Stirring until just combined keeps the texture fudgy, allowing the brownies to rise correctly.
Step 6: Fold in the chopped Oreos and chocolate chips (if using).
Folding in the Oreos ensures they are evenly distributed without breaking down too much. It adds delightful pockets of crunch and creaminess.
Step 7: Pour the batter into the prepared baking pan, spreading it evenly.
Evenly spreading the batter prevents uneven cooking. It also ensures that every brownie has a consistent texture and flavor.
Step 8: Bake in the preheated oven for 25-30 minutes, or until a toothpick comes out with moist crumbs.
Baking time is crucial; under-baking results in gooey brownies, while over-baking makes them dry. Checking with a toothpick helps achieve the perfect balance.
Step 9: Allow the brownies to cool in the pan for 15 minutes before transferring to a wire rack.
Cooling allows the brownies to set, making them easier to cut. Moving them to a wire rack prevents them from steaming in the pan.
Step 10: Once cooled, cut into squares and serve.
Cutting brownies once fully cooled ensures clean edges and proper serving size. Enjoying them at room temperature allows flavors to shine.

Unleashing Chocolate Dreams
Oreo brownies aren’t just an ordinary dessert; they are a celebration of chocolate in various forms. With the combination of cocoa powder, chocolate chips, and the irresistible chunks of Oreo, every bite is a chocolate lover's dream come true. The melting chocolate melds wonderfully with the creamy centers of Oreos, creating an indulgent experience that is hard to resist.
Customizable Delights
One of the beauties of Oreo brownies is their versatility. You can easily customize the recipe by adding ingredients like nuts, caramel, or even different flavored Oreos. Experimenting with various toppings, such as a drizzle of chocolate or a sprinkle of sea salt, can elevate your brownies from delicious to extraordinary.
Perfect for Sharing
These brownies are perfect for gatherings, parties, or as a delightful treat for loved ones. Their unique flavor combination makes them a conversation starter, and they appeal to a wide audience. Whether served at a casual get-together or a more formal occasion, Oreo brownies are sure to impress and satisfy.
FAQs
What if my brownie batter is too thick?
If the batter feels too thick, you can add a tablespoon of milk or water to help loosen it up. This will make it easier to spread in the pan while maintaining the fudgy texture.
Can I use double-stuffed Oreos instead of regular?
Yes, using double-stuffed Oreos will enhance the creaminess of the brownies. Just be mindful that it might add a bit more sweetness.
What can I do if my brownies are overcooked?
If your brownies are overcooked, they may become dry. Try serving them warm with a scoop of ice cream, which can help mask the dryness and enhance the overall experience.
Why did my brownies turn out too crumbly?
Crumbly brownies can result from overmixing the batter or using too much flour. Ensure ingredients are measured accurately, and mix gently.
Can this recipe be adjusted for a larger batch?
If you want to make a larger batch, simply multiply the ingredients by 1.5 or 2, depending on your needs. Adjust baking time accordingly.
Are there any tips for achieving the perfect brownie texture?
To achieve a fudgy texture, avoid overbaking and make sure to use good quality cocoa powder. Letting the brownies cool completely before cutting helps maintain moisture.
Conclusion
Oreo brownies present an incredible opportunity to enjoy two beloved treats in one delectable bite. With their rich chocolate flavor and delightful crunch, they're perfect for any occasion.
Whether you're sharing with friends or treating yourself, these brownies are bound to impress. Baking with joy will ensure that every bite is a reminder of the delightful experience of making and enjoying these incredible sweets.
Recipe Card
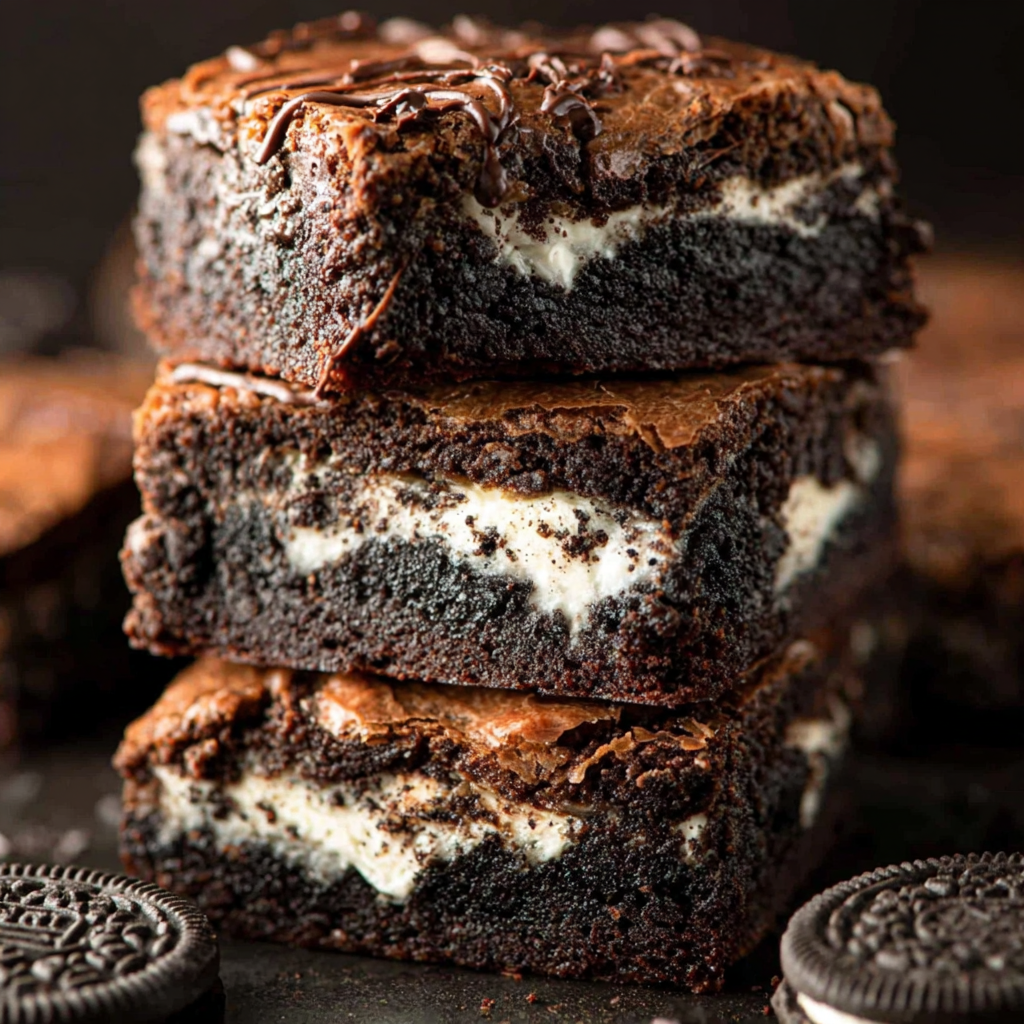
Decadent Oreo Brownies Perfect for Any Occasion
Ingredients
Method
- Preheat the oven to 350°F (175°C) and grease a baking pan.
- In a mixing bowl, combine melted butter and sugar until smooth.
- Add eggs one at a time, mixing after each addition, then stir in vanilla extract.
- In another bowl, whisk together the flour, cocoa powder, baking powder, and salt.
- Gradually add the dry ingredients to the wet mixture, stirring until just combined.
- Fold in the chopped Oreos and chocolate chips (if using).
- Pour the batter into the prepared baking pan, spreading it evenly.
- Bake in the preheated oven for 25-30 minutes, or until a toothpick comes out with moist crumbs.
- Allow the brownies to cool in the pan for 15 minutes before transferring to a wire rack.
- Once cooled, cut into squares and serve.
Notes
Additional serving suggestions: pair with a crisp salad, garlic bread, or roasted seasonal vegetables for balance.
For make-ahead, prep components separately and assemble just before heating to preserve texture.
Taste and adjust with acid (lemon/vinegar) and salt right at the end to wake up flavors.